

In the past few years, many users frequently reported the H series error code. One of the most common errors is QuickBooks error H505. If you are also facing this error then this article will help you to resolve them.
QuickBooks Error H505 occurs when the user tries to open a company file and date on another computer that doesn’t have the proper establishment setup or the required installation.
The H series errors which occur in software are related to the hosting setting problem. When this error occurs then a message pops up on your computer like “QuickBooks has faced a problem and needs to close. Sorry for any convenience caused”.
Causes of QuickBooks Error H505
- The hosting configuration is incorrect on your device.
- When the .ND file is incorrect and damaged.
- Incorrect setting of the DNS.
- When the QuickBooks database server manager can’t find the IP address of the computer.
- The firewall setting is blocking the communication to the company file.
- When the QuickBooksDBXX service is unable to run.
- When the QuickBooks folder can’t be scanned by the Database server.
Symptoms Of QuickBooks Error H505
- The main sign is that you can’t use multi-user mode.
- The crashes of a QuickBooks program window.
- Start freezing or become unresponsive to your system.
- When the stored QuickBooks company file failed to open.
- Your window strat function slowly.
- An error message pops up on your computer screen.
Points To Remember
- Check that your QuickBooks Software is installed properly in your system.
- Ensure that the full QuickBooks desktop version with database or license manager only hosts your system.
- Install the QuickBooks application on the server, without this you can’t use the multi-user mode.
- To download the QuickBooks go to the QuickBooks official website.
- Run the QuickBooks file doctor for your server system and sign in to the host server as the system admin users.
- Check that the company file has a backup.
- Update the latest version of QuickBooks Desktop.
- In the ‘QuickBooks Tools Hub’ tap on the Quick fix my program.
- Check the firewall setting and configure it so that in the middle of the process this setting will not obstruct.
Ways To Troubleshoot QuickBooks Error H505
There are many ways to resolve this error. Follow all the steps below mentioned:-
Solution 1- Use QuickBooks File Doctor Tools
- Firstly, check that the QuickBooks desktop is installed on your server and have the access to the network.
- You have to download the QuickBooks File Doctor Tools. Then, install it on your server.
- QuickBooks File Doctor can solve all the H series errors.
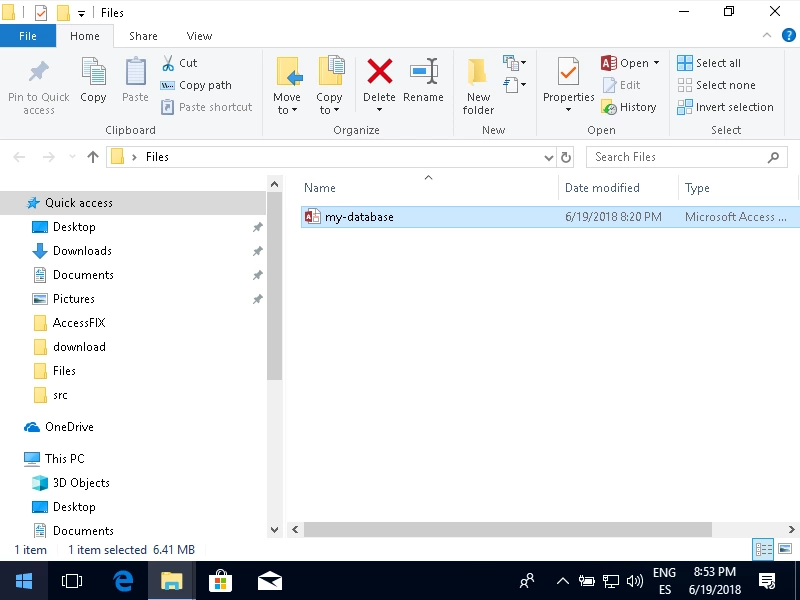
Solution 2- Create New Folder For Company File
- In the hosting computer create a new folder.
- When the folder is created then check the window have permission to enter on the company file.
- Now copy the .qbw file in new folders.
- At last, go to multi-user mode and open the company file.
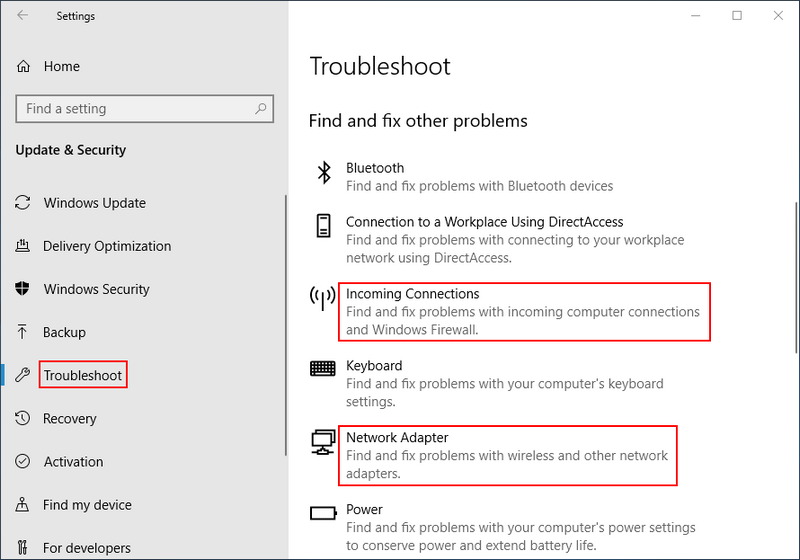
Solution 3- Set up the Firewall Setting

- Firstly, Open a Run Dialogue Box by pressing the Window + R keys together.
- Now open the control panel and tap on the Run button.
- Then, choose the system and security option to open.
- After that, open Window Firewall and Network protection.
- Go to the Advanced Setting option and tap on the inbound rule.
- New rule> port> next.
- Now, correct the TCP option.
- Then, enter the port of your QuickBooks Desktop’s year version and tap on next.
- At last, restart your QuickBooks Desktop.
Solution 4- Set up the Hosting Setting
If the above steps don’t work then try to assess the hosting settings.
Verify the Hosting Setting
- Restart the QuickBooks Software on both servers.
- Open the QuickBooks on both systems which are set up as multi-user.
- Go to file> utilities> stop hosting multi-user access.
- Now tap on the Host multi-user access or turn on hosting then click on the Utilities option.
Verify QuickBooks Services
- Open the Run box and press the Window + R key together.
- Now type in the MSC key and then you see Service.msc in window search.
- Search for the QuickBooksDBXX service, then double click on it.
- Check that the startup type is opted as Automatic.
- Now, click on the Recovery tab.
- Manually restart QuickBooksDBXX service, if failed. If needed then repeat the same process again.
- Tap on OK to save the changes.
- Now, repeat the steps for the same QBCFMonitorService.
- Open the QuickBooks in multi-user mode on each digital system.
- At last, you need to look form a QuickBooksDBXX Service which has a member of the admin cluster and accepts permissions.
Solution 5- Change The Setting Of A Firewall
- Tap on the window button then go to the control panel.
- Select the Firewall setting.
- Select allow a program via the system’s firewall.
- Click on New program then on the exception list add QuickBooks 20xx.
- At last, reboot your system and your changes will be saved.
According to your QuickBooks Desktop version add them on port-
- QuickBooks Desktop Version 2016- 8019, 56726, 55368, 55372
- QuickBooks Desktop Version 2017- 8019, 56727, 55373, 55377
- The QuickBooks Desktop Version 2018- 8019, 56728, 55378, 55382
- QuickBooks Desktop Version 2019- 8091, xxxx
- QuickBooks Desktop Version 2020- 8091, xxxx
Solution 6- Host File Editing
To find the IP address
- Open Run window by pressing window + R key together.
- Type cmd > enter to open Command Prompt window.
- Now, type ‘ipconfig/all’ to run the command.
- Lastly, write ‘hostname and IP address. Repeat the processes in all the systems which have a multi-user setup.
Edit window host file
- Move to start menu
- Go to the PC option and visit these two addresses ‘C:\Window\Systems32\Drivers\Etc’ or ‘C:\Window\Syswow64\Drivers\Etc’.
- If you can’t find the window folder then follow the steps to see hidden files and folders.
- Click on View tab> hidden item, Now you will see hidden files.
- Right-click on the view tab> click on open with option> open the same notepad.
- Fill in the IP address and system name.
- Ensure that you use the tab key, avoid the space bar.
- At last, save and reopen the QuickBooks Software in Multi-user mode.
Solution 7- Run the QuickBooks Database Server Manager
- Download and install the QuickBooks Tools Hub
- Download the QuickBooks tool hub file. Then save it in a folder.
- Open that file ‘QuickBooksToolHub.exe’
- Now, follow all the instructions which pop up on your system screen.
- Agree with all the terms and conditions.
- To open the tool hub double tap on the icon.
From Tool Hub Program Run Database Server Manager
- From the QuickBooks tool hub, choose the Network issues.
- Select QuickBooks database server manager.
- Tap on the start scan option.
- The database server manager will repair the firewall permission, When the scanning is over then tap on the close button.
- When the error is seen, then open the QuickBooks on each. Choose file> switch to multi-user mode.
Solution 8- Host The Company Files
Hosting your own Network
If you already installed the database server manager then follow the two steps to set up:-
- ull program option- you installed the full version of the QuickBooks Desktop and Database server system.
- Server option- installed the Database server manager on the server system.
Solution 9- Network Ports that QuickBooks Uses to Transmit Knowledge
Built Firewall Setting
- Firstly, open the firewall then clicks on the Window Firewall and tap on the advanced setting.
- Then, click on the Outbound rule and choose a new rule.
- Now, click on TCP and on a specific port enter the following port.
- Tap on next> allow the connection.
- Type in the name and tap on the finish.
- Repeat step for inbound rules 1-5.
- Move to multi-user mode and then open QuickBooks.
Turn on Network Discovery
- Open control panel> system and security.
- Press on Window Firewall. And click on the permit associate app/feature.
- Tap on modification.
- Select Network discovery and hit OK.
Name Of The Server
- Open the RUN command and tap on Window + R together. Then type CMD.
- Now, enter config/all.
- In the IP configuration search for the hostname.
- Then you will see the server name and save them.
Solution 10- Check The Server
- Open the window then on the server system start menu.
- Now, open the RUN tab then type services.msc in the Run window.
- Then, click on the QuickBooksDBXX on the list.
- For the startup, type choose the automatic tab.
- Check the service status is starting to run or not. If not then choose the start tab.
- Click on the recovery tab.
- Restart the service after that tap on the apply button and save the change.
- For QBCFMonitorService repeat the same steps.
Final word!
This article is about resolving the QuickBooks Error H505 and I hope this is useful for you and you have followed all the solutions correctly. Please visit our other articles if you are facing some related issues.